In this article, we will generate a movement script for FPS games in Unity. We’ll cover all the mechanics like camera control, crouching, and dashing.
Moving in X and Z Axis
Let’s begin with implementing moving in X and Z Axis. In this article, I’ll do all mechanics with Rigidbody (I don’t use Character Controller).
using UnityEngine;
using System.Collections;

public class Move : MonoBehaviour
{
	private float xAxis, zAxis;
	private float moveSpeed = 405.5f;
    [SerializeField]
	private Rigidbody rb;

	void Awake() => rb = GetComponent<Rigidbody>();

    private void Update()
    {
		xAxis = Input.GetAxis("Horizontal") * moveSpeed * Time.deltaTime;
		zAxis = Input.GetAxis("Vertical") * moveSpeed * Time.deltaTime;
    }

    void FixedUpdate()
	{
		rb.velocity = transform.forward * zAxis + transform.up * rb.velocity.y + transform.right * xAxis;
	}
}
Step by Step Code How It Works
- xAxis and zAxis float variables are used for holding X and Z axis changes from user input.
- moveSpeed variable holds a decimal number that allows us to adjust the speed of the character.
GetComponent<Rigidbody>();It allows for defining the component. We defined the Rigidbody component here.xAxis = Input.GetAxis("Horizontal")It’s for getting data from W A S D keys (works the same as GetKey) and returns negative and positive floats.Time.deltaTime;The interval in seconds from the last frame to the current one (Read Only).rb.velocityAllows you to set the velocity of the object (usually used in AddForce, but velocity can also be used).
transform.forward * zAxis + transform.up * rb.velocity.y + transform.right * xAxis; Finally, let’s take a look at how this piece of code works.
It works based on the logic of adding vectors, for example, if you use XAxis alone, you will only move in the right or left direction.
Because zAxis will be zero, the vector that provides the forward and back movement will also be 0 and the player wouldn’t move in this direction (The y axis does not change).
If you trigger X-Axis and Z-Axis at the same time, the result of the two vectors will add up and your velocity will be in a diagonal direction.
Creating the Camera Script
We finished the first part, now we are going to create a camera script to rotate the character and camera with the mouse.
using System.Collections;
using System.Collections.Generic;
using UnityEngine;

public class MouseRotation : MonoBehaviour
{
    private float xMouse, yMouse;
    private float yRotation, xRotation;
    private float sensivity = 405.5f;
    [SerializeField]
    private Transform playerTransform;

    // Start is called before the first frame update
    void Start()
    {
        Cursor.lockState = CursorLockMode.Locked;
    }

    // Update is called once per frame
    void Update()
    {
        xMouse = Input.GetAxis("Mouse X") * sensivity * Time.deltaTime;
        yMouse = -Input.GetAxis("Mouse Y") * sensivity * Time.deltaTime;

        yRotation += yMouse;
        xRotation += xMouse;
        yRotation = Mathf.Clamp(yRotation, -90, 90);

        transform.rotation = Quaternion.Euler(yRotation, xRotation, 0);
        playerTransform.Rotate(Vector3.up * xMouse);
    }
}
Step by Step How Code Works
- xMouse and yMouse have the same duty with XAxis and YAxis variables. They hold mouse inputs.
- yRotation and xRotation variables use for gathering xMouse and yMouse data. When examining the
Quaternion.Eulerfunction, I’ll talk about why we add. Cursor.lockState = CursorLockMode.Locked;Once the game starts, it fixes your mouse to the center of the screen for once (not permanently).xMouse = Input.GetAxis("Mouse X")Returns a float value based on where your mouse is (holds only the X-axis of the mouse).
As you know, XMouse takes a value as the mouse continues to move along the X axis, then it is 0.
However, the Euler function does not increase rotation values compared to Rotate function.
The Eular function equates the rotation directly to the given number (but does it smoothly).
Therefore, if you use this value with the Euler function, it will return to 0 every frame (previous rotations will be invalid.)
yRotation = Mathf.Clamp(yRotation, -90, 90);We use the Clamp function to limit the rotation on yAxis, this function determines the min and max values of the variable.transform.rotation = Quaternion.Euler(yRotation, xRotation, 0);We used it to rotate the camera object.playerTransform.Rotate(Vector3.up * xMouse);Since the direction of the character will have to change as the camera rotates, we use this function, it rotates the character on the x-axis.
Making Jump Mechanic
We will make a jump mechanic for the character. Let’s continue editing the Move script.
using UnityEngine;
using System.Collections;

public class Move : MonoBehaviour
{
	private float xAxis, zAxis;
	private float moveSpeed = 305.5f;

    private bool jumpActive;
    private int jumpHeight = 6;
    private RaycastHit hit;

    [SerializeField]
    private Collider playerCollider;
    [SerializeField]
	private Rigidbody rb;
    [SerializeField]

	void Awake() => rb = GetComponent<Rigidbody>();

    private void Update()
    {
		xAxis = Input.GetAxis("Horizontal") * moveSpeed * Time.deltaTime;
		zAxis = Input.GetAxis("Vertical") * moveSpeed * Time.deltaTime;

        if (Input.GetKeyDown(KeyCode.Space) && onGround()) jumpActive = true;
    }

    void FixedUpdate()
	{
		rb.velocity = transform.forward * zAxis + transform.up * rb.velocity.y + transform.right * xAxis;

        if (jumpActive)
        {
            rb.AddForce(0, jumpHeight, 0, ForceMode.Impulse);
            jumpActive = false;
        }
    }

    private bool onGround()
    {
        if(Physics.Raycast(transform.position , -transform.up , out hit , 1.45f))
        {
            if(hit.collider.tag == "Ground")
            {
                return true;
            }
        }

        return false;
    }
}
Step by Step How Code Works
if (Input.GetKeyDown(KeyCode.Space) && onGround()) jumpActive = true;If the onGround function keeps true value and the user presses the space key jumpActive variable is set to true.
if (jumpActive)
{
   rb.AddForce(0, jumpHeight, 0, ForceMode.Impulse);
   jumpActive = false;
}
In the above code, if jumpActive is true, the character gets an upward force on the y-axis by the determined jumpHeight (it has an explosion-like effect because it is Impulse).
Afterward, the jumping feature is taken from the player, in order to regain this feature, must press the spacebar and be on the ground.
private bool onGround()
{
    if (Physics.Raycast(transform.position, -transform.up, out hit, 1.45f))
    {
        if (hit.collider.tag == "Ground")
        {
            return true;
        }
    }

    return false;
}
The function here allows us to perform ground control. You can think of Raycast as a line segment with a beginning and an end (it might have no end).
Its task here is to determine if the player is touching the ground, the function returns true if the line segment touches a collider with the Ground tag (Otherwise it return false as default).
If you want to add a double jump mechanic to your character, you can read this article to learn how can implement it.
Adding Dash to Player
Let’s add a dash feature to our player. Dash is a very fascinating feature for games. It makes the game fun.
Dash is a situation where the character increases his speed for a certain period of time or without a certain time interval (Probably you know).
using UnityEngine;
using System.Collections;
using UnityEngine.UIElements;

public class Move : MonoBehaviour
{
	private float xAxis, zAxis;
	private float moveSpeed = 405.5f;

    private bool jumpActive;
    private int jumpHeight = 6;
    private RaycastHit hit;

    private float dashSpeed = 100f;

    [SerializeField]
    private Collider playerCollider;
    [SerializeField]
	private Rigidbody rb;
    [SerializeField]

	void Awake() => rb = GetComponent<Rigidbody>();

    private void Update()
    {
		xAxis = Input.GetAxis("Horizontal") * moveSpeed * Time.deltaTime;
		zAxis = Input.GetAxis("Vertical") * moveSpeed * Time.deltaTime;

        if (Input.GetKeyDown(KeyCode.Space) && onGround()) jumpActive = true;
    }

    void FixedUpdate()
	{
		rb.velocity = transform.forward * zAxis + transform.up * rb.velocity.y + transform.right * xAxis;

        if (jumpActive)
        {
            rb.AddForce(0, jumpHeight, 0, ForceMode.Impulse);
            jumpActive = false;
        }

        if (Input.GetKey(KeyCode.LeftShift))
        {
            Vector3 dashVector = new Vector3(rb.velocity.x, 0, rb.velocity.z) * dashSpeed;
            rb.AddForce(dashVector);
        }
    }

    private bool onGround()
    {
        if(Physics.Raycast(transform.position , -transform.up , out hit , 1.45f))
        {
            if(hit.collider.tag == "Ground")
            {
                return true;
            }
        }

        return false;
    }
}
Move script may be getting harder to read as it gets more and more functions and inputs, but don’t worry, the line of code I added for Dash is less than 10 lines.
private float dashSpeed = 100f;The new speed variable I added, dashSpeed keeps the speed value that will contribute in addition to the normal speed.
if (Input.GetKey(KeyCode.LeftShift))
{
    Vector3 dashVector = new Vector3(rb.velocity.x, 0, rb.velocity.z) * dashSpeed;
    rb.AddForce(dashVector);
}
The conditional structure above shows what operations will be performed if the shift on the left side of the keyboard is pressed.
dashVector local variable multiplies the instant x and z coordinates of the character with the dashSpeed variable, increasing the speed on the X and Z axis.
Using AddForce we apply extra force on velocity values. Right now our character speed is increasing by another 100f.
Crouch!
We came last part of the fps movement script (at least in the article). We need to crouch (maybe we’d have to go under obstacles).
Note: Crouching is usually done with animation. In this section, I will reduce the scale value on the y-axis of the character.
using UnityEngine;
using System.Collections;
using UnityEngine.UIElements;

public class Move : MonoBehaviour
{
	private float xAxis, zAxis;
	private float moveSpeed = 405.5f;

    private bool jumpActive;
    private int jumpHeight = 6;
    private RaycastHit hit;

    private float dashSpeed = 100f;
    private float heightOfPlayer;

    [SerializeField]
    private Collider playerCollider;
    [SerializeField]
	private Rigidbody rb;
    [SerializeField]

	void Awake() => rb = GetComponent<Rigidbody>();

    private void Start() => heightOfPlayer = transform.localScale.y;

    private void Update()
    {
		xAxis = Input.GetAxis("Horizontal") * moveSpeed * Time.deltaTime;
		zAxis = Input.GetAxis("Vertical") * moveSpeed * Time.deltaTime;

        if (Input.GetKeyDown(KeyCode.Space) && onGround()) jumpActive = true;

        if (Input.GetKey(KeyCode.LeftControl)) transform.localScale = new Vector3(transform.localScale.x, heightOfPlayer / 1.5f, transform.localScale.z);
        else transform.localScale = new Vector3(transform.localScale.x, heightOfPlayer, transform.localScale.z);
    }

    void FixedUpdate()
	{
		rb.velocity = transform.forward * zAxis + transform.up * rb.velocity.y + transform.right * xAxis;

        if (jumpActive)
        {
            rb.AddForce(0, jumpHeight, 0, ForceMode.Impulse);
            jumpActive = false;
        }

        if (Input.GetKey(KeyCode.LeftShift))
        {
            Vector3 dashVector = new Vector3(rb.velocity.x, 0, rb.velocity.z) * dashSpeed;
            rb.AddForce(dashVector);
        }
    }

    private bool onGround()
    {
        if(Physics.Raycast(transform.position , -transform.up , out hit , 1.45f))
        {
            if(hit.collider.tag == "Ground")
            {
                return true;
            }
        }

        return false;
    }
}
Step by Step How Code Works
private float heightOfPlayer;The only variable we add extra to the code. This variable will hold the scale value on the y axis of the character.private void Start() => heightOfPlayer = transform.localScale.y;When the game starts, we get the scale value of the y axis.
if (Input.GetKey(KeyCode.LeftControl)) transform.localScale = new Vector3(transform.localScale.x, heightOfPlayer / 1.5f, transform.localScale.z);
else transform.localScale = new Vector3(transform.localScale.x, heightOfPlayer, transform.localScale.z);
I didn’t use curly braces as it’s on a single line, but it can be used optionally for this conditional structure (use it if it’s hard for you to read).
When the control key on the left of the keyboard is pressed, the vertical size of the character is halved and it returns to normal when released.
Testing Scripts
Congratulations, you finished all the needed scripts. Let’s test these scripts in the actual game.
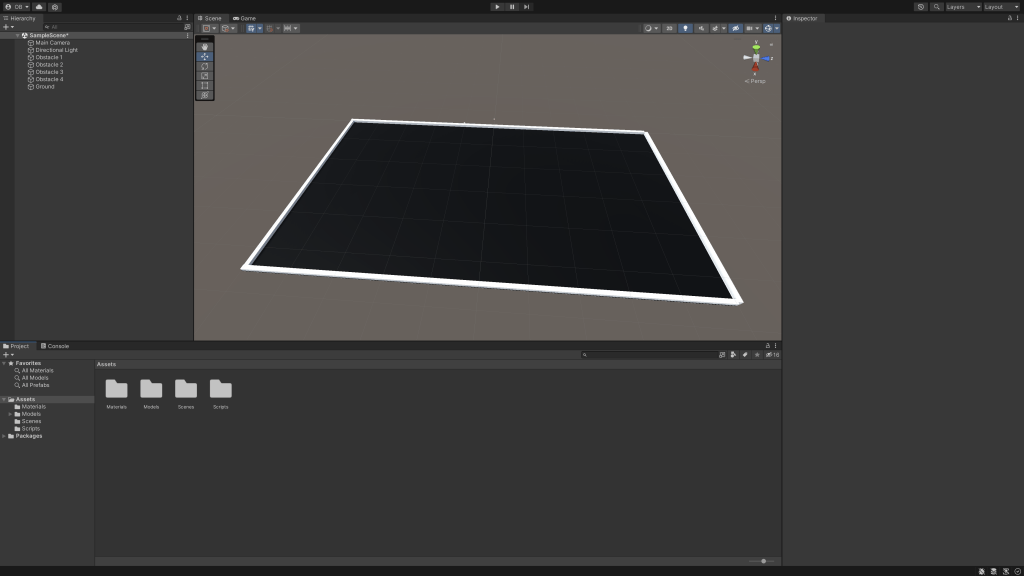
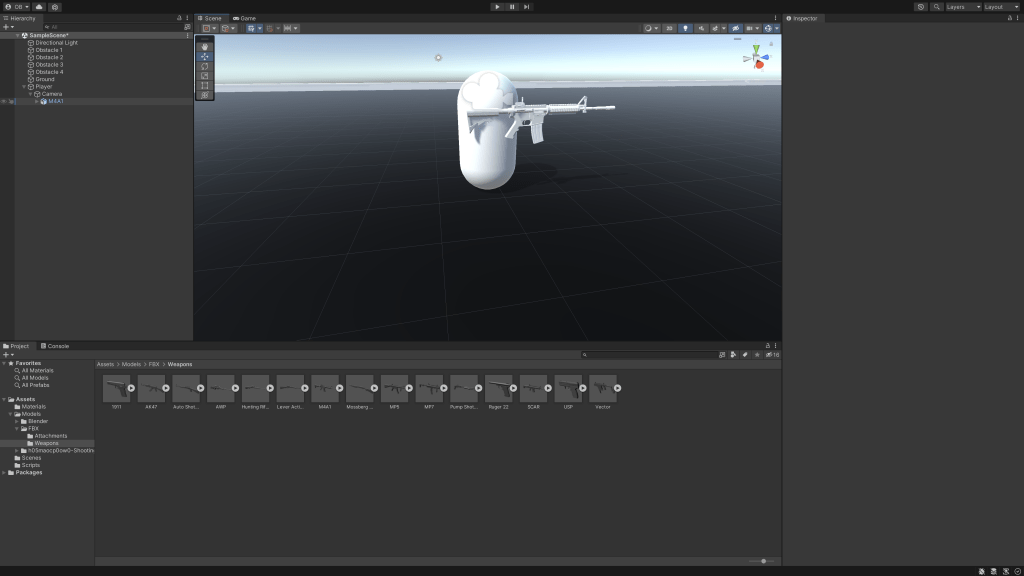
In the scene must be a capsule (as a character), the floor (with its surroundings closed), the camera (above the capsule), and finally the weapon (optional).
You can get the weapon models for free from this website (Free 3D), these are free for personal use.

Don’t forget to change the tag of the ground, now let’s create the character and add it to the environment.

I am aware that it does not aesthetics, but since our main topic is programming, it will manage for now.
Add the “Move” script to the character and the “MouseRotation” script to the camera. After adding the rigidbody and trigger collider to the character, your project setup is finished.
Conclusion
We have finished most of the features that can be in an FPS game from scratch in this article. I hope it was useful.
You can access the Unity project on Github. If you find any bugs feel free to report them (or you might have suggestions, report these too).

Thank you for your feedback I’ll fix my typo issues as soon as possible