In this article, we will make a simple login system in SwiftUI. After this article, you will be able to make a custom login system for your application.
Step 1 – Setting Background and Adding Header
Let’s start with adding background and headers to the login page. I’m going to set the background a green color, then add a caption to the top of the page.
import SwiftUI

struct LoginSystem: View {
    var body: some View {
        Color.green.ignoresSafeArea()
            .overlay(VStack{
            Text("Login System")
            .font(.largeTitle)
            .bold()
            .foregroundColor(.white)
            .padding()
        })
    }
}

struct LoginSystem_Previews: PreviewProvider {
    static var previews: some View {
        LoginSystem()
    }
}
I covered the background with green with no space left, and then I added a bold large title.
Step 2 – TextField & SecureField
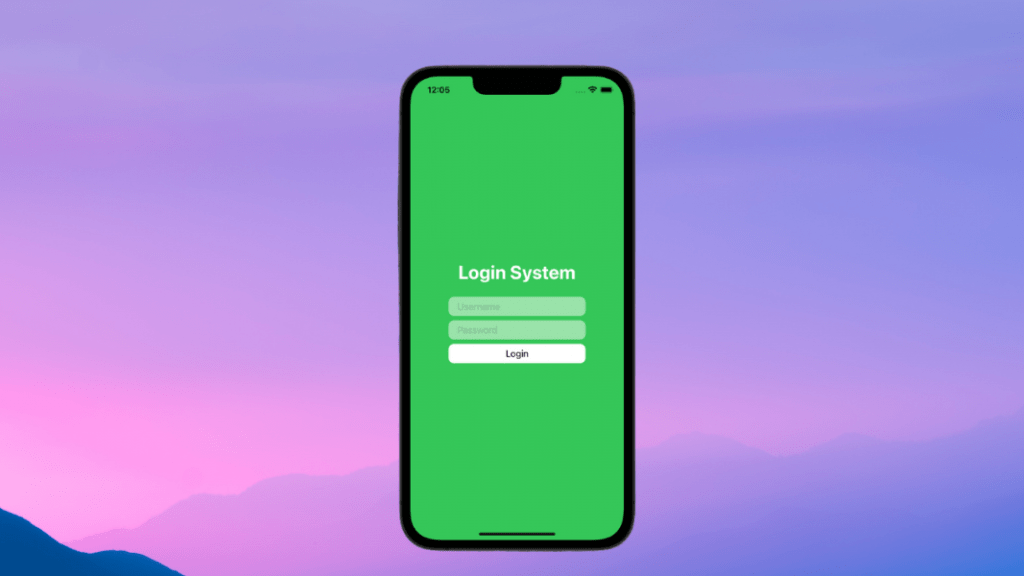
Let’s start making the UI where the user will type and send their information. In this section, we will create Text Field and Secure Field for passwords and usernames.
Then we will design the button to send the information and request access to the application.
import SwiftUI

struct LoginSystem: View {
    @State var password: String = ""
    @State var username: String = ""
    var body: some View {
        Color.green.ignoresSafeArea()
            .overlay(VStack{
            Text("Login System")
            .font(.largeTitle)
            .bold()
            .foregroundColor(.white)
            .padding()

            TextField("Username" , text:$username)
            .padding()
            .frame(width: 250, height: 35)
            .background(Color.white.opacity(0.5))
            .cornerRadius(10)
            .disableAutocorrection(true)
            .autocapitalization(.none)

            SecureField("Password" , text:$password)
            .padding()
            .frame(width: 250, height: 35)
            .background(Color.white.opacity(0.5))
            .cornerRadius(10)
            .disableAutocorrection(true)
            .autocapitalization(.none)

            Button("Login"){
                print("Worked!")
            }
            .padding()
            .foregroundColor(.black)
            .frame(width: 250, height: 35)
            .background(Color.white)
            .cornerRadius(10)
        })
    }
}

struct LoginSystem_Previews: PreviewProvider {
    static var previews: some View {
        LoginSystem()
    }
}
A nice image has started to form, now let’s create the system that will check the password and username.
Step 3 – Finishing Login System
In this section, we will finish the login system from top to bottom and set up all the functionality.
@State var warningText: String = ""
@Binding var signInSuccess: Bool
Let’s start by adding these two variables to the LoginSystem view. These variables will keep the information whether the user is logged in or not.
Button("Login"){
   if username == "admin" && password == "pass"{
      self.signInSuccess = true
   }else{
      warningText = "Login Failed!"
   }
}
.padding()
.foregroundColor(.black)
.frame(width: 250, height: 35)
.background(Color.white)
.cornerRadius(10)
Now when the button is pressed, username and password will be checked and an error will appear depending on the situation.
We will add another text to the application, this text will print the warning text on the screen, if the application runs successfully, there will be no value on the screen.
struct LoginSystem: View {
    @State var password: String = ""
    @State var username: String = ""
    @State var warningText: String = ""
    @Binding var signInSuccess: Bool
    var body: some View {
        Color.green.ignoresSafeArea()
            .overlay(VStack{
            Text("Login System")
            .font(.largeTitle)
            .bold()
            .foregroundColor(.white)
            .padding()

            TextField("Username" , text:$username)
            .padding()
            .frame(width: 250, height: 35)
            .background(Color.white.opacity(0.5))
            .cornerRadius(10)
            .disableAutocorrection(true)
            .autocapitalization(.none)

            SecureField("Password" , text:$password)
            .padding()
            .frame(width: 250, height: 35)
            .background(Color.white.opacity(0.5))
            .cornerRadius(10)
            .disableAutocorrection(true)
            .autocapitalization(.none)

            Button("Login"){
                if username == "admin" && password == "pass"{
                    self.signInSuccess = true
                }else{
                    self.signInFailed = true
                    warningText = "Login Failed!"
                }
            }
            .padding()
            .foregroundColor(.black)
            .frame(width: 250, height: 35)
            .background(Color.white)
            .cornerRadius(10)

            Text("\(warningText)")
            .font(.system(size:15))
            .bold()
            .foregroundColor(.red)

        })
    }
}
This is the final form of the View, now we have to create another view where we can use this view.
The new view we created will bring the login page or the welcome message to the screen according to the signInSuccess variable it receives from LoginSystem.
struct AppLogin : View{
    @State var signInSuccess: Bool = false
    var body: some View{
        if signInSuccess {
            AppHomePage()
        }else{
            LoginSystem(signInSuccess: $signInSuccess)
        }
    }
}
struct AppHomePage: View {
var body: some View {
Text("WELCOME!")
.bold()
.padding()
.font(.largeTitle)
.foregroundColor(.green)
}
}import SwiftUI
@main
struct LoginSystemApp: App {
var body: some Scene {
WindowGroup {
AppLogin()
}
}
}How the View works: The signInSuccess variable is given to the LoginSystem, then the system updates this variable.
If the signInSuccess is true, the AppHomePage view appears on the screen, if it is wrong, the LoginSystem still views with a warning message.
You can get the source codes of the application from my Github account (click here for acess github account).