In this article, we’ll use Google Sheets as a database with the help of Python. Use SQL or NoSQL softwares when large databases and complex operations are required.
A reminder before you start reading the article Google Sheets isn’t exactly database software, but it’s a simple spreadsheet program where you can store your data.
Creating Google API Project
To gain access to Google’s products, we must first obtain authorization through Google APIs. Before proceeding to the queries, we will look at how to obtain authorization in this section.
Enter Google Cloud and hit create new project and name your project, add organization if any, and continue.
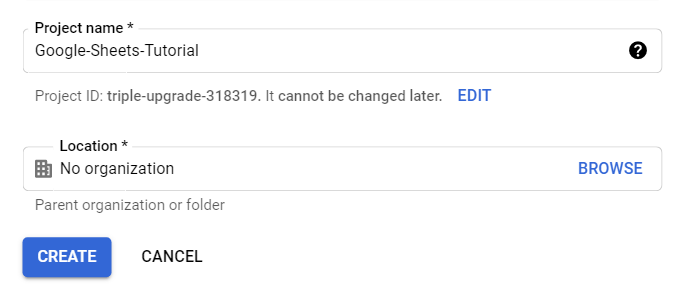
It will only take a few seconds to make. The notification section will notify you once it has been created. When you select your project, the screen should look like the one below.
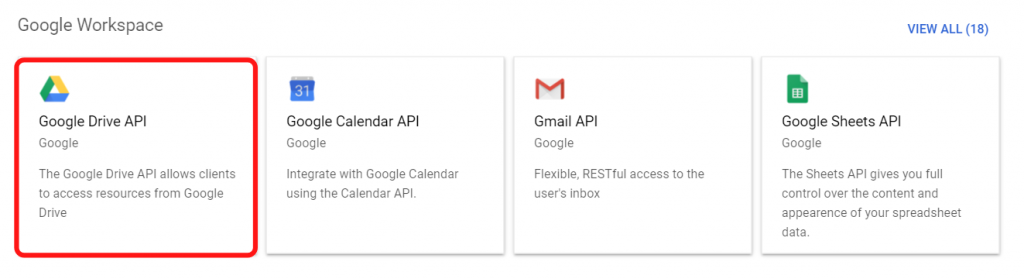
Then, from the side menu, select libraries, and then, from the Google Workspace menu, select the Google Drive API.
When you enable the Google Drive API, you must go through the process of creating credentials. Then you should see the following screen.
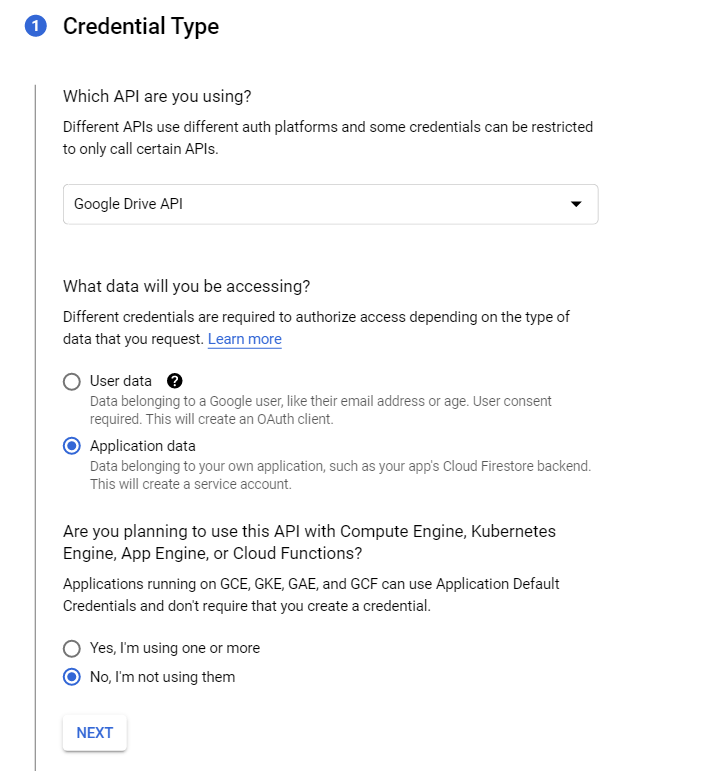
To simplify summarize the above settings, we stated that we want to access the Google Drive API and that we want to access the application data in Google Drive.
When you press the Next button, it will prompt you for more information about the service account. We will use this service account to use the credentials.

When you continue, an optional section will appear, you can choose a role and assign a condition to this role.
Congratulations, your service account has been created. We will now need a JSON file, so click on it twice to get it, then go to the Key menu from the opened window and select Add Key, a screen similar to the one below will appear.
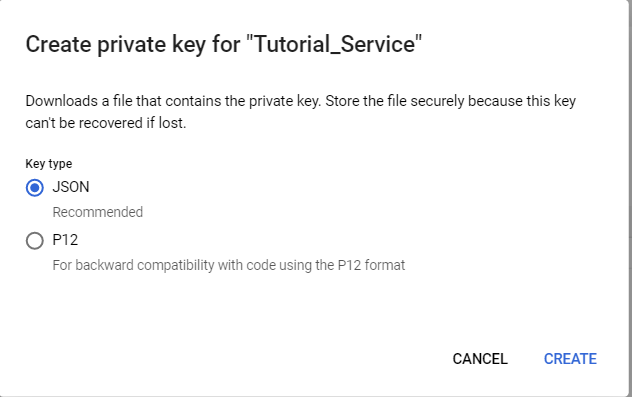
When you click the Create Key button, Google Cloud will begin installing a JSON file on your computer; do not delete this important file. Add this file to your main project folder.
Share Table to Service Account
In this section, we will share a table on Google Sheets with the service user we created, after this section, we will be ready to operate on the table.
There is a simple dataset I found on Kaggle, you just need to open it via Google Sheet. Then follow the steps below.
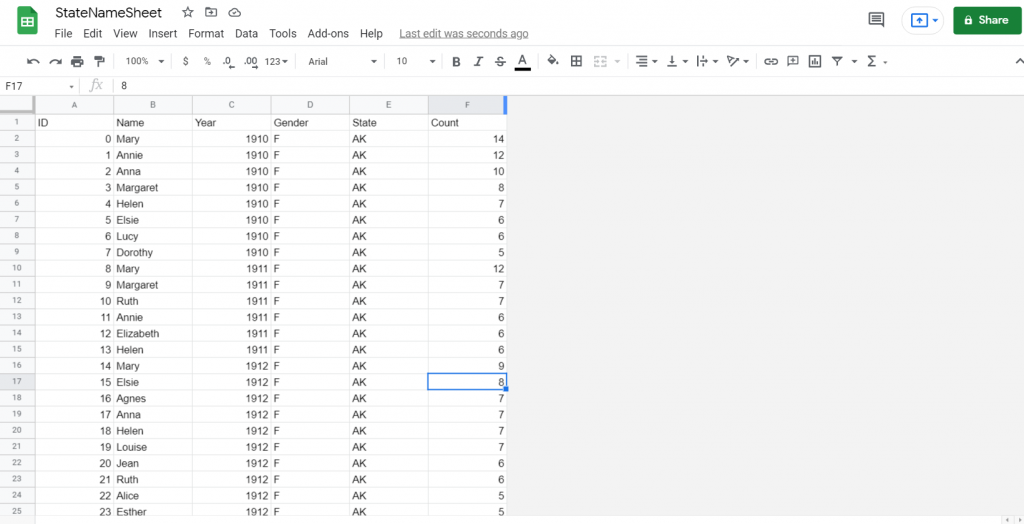
This table contains data on how babies born in the USA are named. You can download it here. You should add this file to Google Drive (just select the CSV file).
Minimize Tables With Python
Important warning, since the file size exceeds the limit of Google Sheet, you need to reduce it via Python with the help of the following codes.
import pandas as pd

data = pd.read_csv("data.csv")
data = data.iloc[0:40000 , :]

data.to_csv("data.csv")
The limit in tables prepared via Google Sheet is wider, but there are some limitations if you import as we do now.
Open Table in Google Sheets
In this section, we will add the file named statenames to Google Sheets and then share it with the service account.
Go to your Drive folder where you uploaded it and right-click on the CSV file then tick open with Google Sheet.
When it opens, you should see a screen like this, press the Share button in the upper right.
When you press the Share button, it will ask you for an e-mail or link. Copy and paste your service account e-mail on the Google Cloud API.
Don’t forget to activate the Google Sheets API via the Google API Console!
Preparing Working Environment
Now we are in the last section before we move on to the queries, in this section, we will install the libraries and finalize the project folder.
pip install gspread
pip install oauth2client
The following attachments should be included in your project: the main dataset file, the Python main file, and the Service Account JSON file.
Using Google Sheets With Python
In this section, we will learn to use our project, which we have completed, with Python. We will delete, edit and view data just like a SQL Database.
# Google Sheets Library
import gspread

# For Service Account
from oauth2client.service_account import ServiceAccountCredentials
After adding the libraries, we will use the JSON file we get from the Google API to interact with the Google Drive API.
s = ["https://www.googleapis.com/auth/drive"]

ID = ServiceAccountCredentials.from_json_keyfile_name("file.json", s)

client = gspread.authorize(ID)
After obtaining access via Google Drive, we need to store the file in a variable. Don’t forget to rename the JSON file.
Getting All Records in Sheets
# Getting All Rows & Columns
data = sheet.get_all_records()

# Convert DataFrame
df = pd.DataFrame(data)
df = df.iloc[: , 1:]

# Show DataFrame
df.head(5)
Get_all_records will display the data as a dictionary, making it difficult to examine, so it is recommended to convert it to DataFrame.
I removed the ID Column as the indexes are added automatically. You can find the output of the code below.

Getting Value from Selected Row & Column
One of the most important features in a database is the ability to display data from the selected rows or columns; let’s take a look at how this feature works in Google Sheets.
# Getting from row
sheet.row_values(2)

# Getting from column
sheet.col_values(3)
['0', 'Mary', '1910', 'F', 'AK', '14']
['Year',
'1910',
'1910',
'1910',
'1910',
'1910',
'1910',]Getting the data in list format reduces efficiency a bit so let’s convert the data to pandas series before displaying it.
# Convert Column Values
data = sheet.col_values(3)
pd.Series(data).head(5)

# Convert Row Values
data = sheet.row_values(3)
pd.Series(data).head(5)
1 Mary 1 Year
2 1910 2 1910
3 F 3 1910
4 AK 4 1910Getting Data from Selected Column and Row
Using Python’s cell function, you can retrieve and display data in the column and row numbers you specify.
# 9 = row , 3 = column
x = sheet.cell(9 , 3).value

print("Date:" , x)
Date: 1910Creating New Rows & Columns
Viewing isn’t enough; now we’ll look at how to add new rows and columns to Google Sheets. It is recommended that you follow each step in this section live on Google Sheets.
data = ["40000",
        "Mark",
        "1935",
        "E",
        "AL",
        "2"]

sheet.append_row(data)
You can use this method to insert a new row in the last one. Don’t forget to check the line you created on Google Sheets. Use the append rows function to add multiple rows.
# Create New 1 column
sheet.add_cols(1)
You can fill the column you’ve created by updating the rows or by adding new rows. Following this section, we will look at how to update the data in the columns.
Updating and Editing Rows
You entered the data incorrectly, it was a mess, and so on. If an event occurs, you can easily update or edit the rows.
sheet.update_cell(row , column , value)you can update the data in the cell you selected like this, it will work if you want to edit a single value.
We may also want to change more than one cell, there is a way, we just need to create a simple loop.
cells = sheet.range("A2:F2")

for cell in cells:
    cell.value = "Updated"

sheet.update_cells(cells)
You can experiment by changing the cells, as we can update the row we need in the deletion, let’s see how to delete the rows and columns.
Removing Rows & Columns
The deletion process is very simple, we can delete both rows and columns with the help of 2 functions.
# remove second row
sheet.delete_rows(2)

# remove seventh column
sheet.delete_columns(7)
Warning for those familiar with Python index order here index starts at 1, not 0! Now let’s try the multiple delete operation.
# Delete from 2 to 5
sheet.delete_rows(2 , 5)

# Delete from 7 to 12
sheet.delete_columns(7,12)
The add_row and add_column functions have been removed please do not use them, to delete a single index, leave the end parameter blank.
Searching Columns & Rows
In querying by condition, it is important in databases, here we will combine the queries we have learned before with the if statement.
cells = sheet.range("A1:A13")

for cell in cells:
  if cell.value == "10":
    cell.value = "X"

sheet.update_cells(cells)
A B C D E
1 1 10 x 1.2
2 2 20 y 2.3
3 3 30 z 3.6
4 4 40 k 4.9
5 X 50 d 6.2Conclusion
Google Sheets has many features that can help you in simple projects to when you don’t need a large database.
With Gspread, you can gain more functionality by using powerful libraries such as pandas and NumPy.
Remember, Google Sheets is not exactly a database program, it is sufficient for simple operations. If possible, prefer SQL or NoSQL software for your database operations.
Hi there, just became aware of your blog through Google, and found that it is really informative.
I’m gonna watch out for brussels. I will be grateful if you continue this in future.
A lot of people will be benefited from your writing.
Cheers!
I need to to thank you for this good read!!
I certainly enjoyed every bit of it. I have you bookmarked to look at new
things you post…